Railway
Creating trackage may seem complicated at first, but you'll get used to it quickly.
All prefabs mentioned are located in the Mapify/Prefabs/Trackage folder.
Track Tools
Thanks to Wiz, we now have a set of tools to make creating trackage easier.
To access the tools, go to Mapify > Track Tools.
You can then dock that window wherever you see fit.
Basic Track
The easiest way to create a track is to use the Track prefab.
Grab it and drag it into the scene.
To avoid issues later, unpack the Track prefab.
You can unpack it by right-clicking on it in the scene hierarchy and clicking "Unpack Prefab Completely."
Only the Track prefab needs to be unpacked.
Each track is made up of a series of points with handles that control how the track will be created between them. There is currently no way to visualize the actual track in the editor.
On each piece of track, you'll see a Track component with a few fields.
Don't worry about those for now. We'll get to them in the Job Generation section.
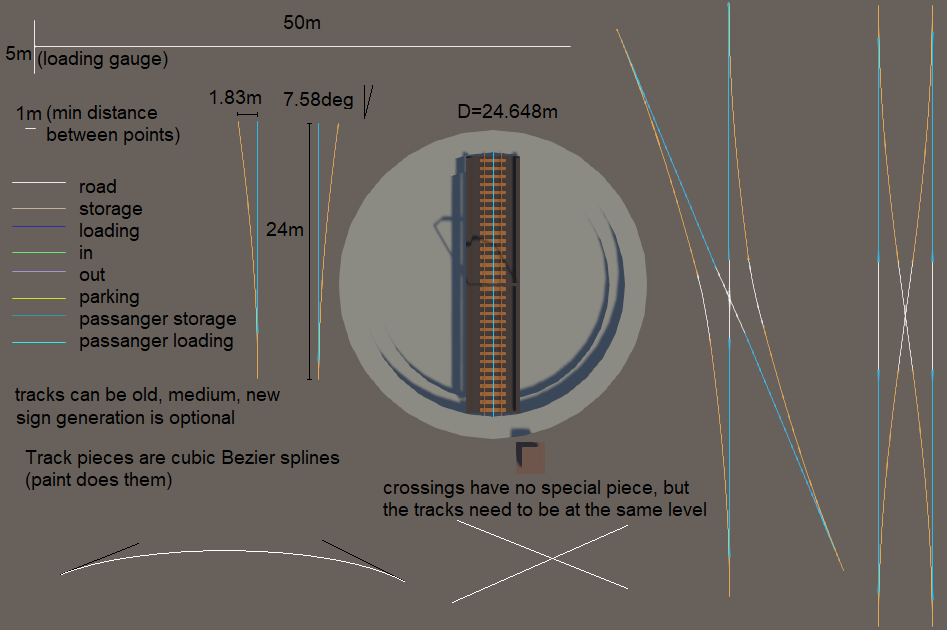
To ensure your track isn't obscured by terrain or other objects, you can toggle Show Loading Gauge on the Track component.
This will show you the loading gauge overlayed on top of the track.
The loading gauge can be customized in the MapInfo object.
The defaults match that of the default Derail Valley map.
Switches
Switches can be placed using the Switch Left and Switch Right prefabs.
By default, the switch stand will be placed on the through side of the switch.
You can change this with the "Stand Side" option on the Switch component.
Switches must have a track attached to all ends.
You cannot modify the curves of switches! Derail Valley switches are a static asset; therefore, you can only use the switch angle they give us.
Turntables
The Default Turntable
The default turntable can be placed using the Turntable prefab.
To replace any one of the meshes on the default table, remove the Vanilla Object component from it and customize the Mesh Filter and Mesh Render as desired.
Custom Turntables
To create a custom turntable, start by creating a new object and adding the Turntable component to it.
Next, as a child, add the Turntable Control Panel prefab from the Components folder.
If you want to replace the mesh of the shed, remove the Vanilla Object component from it and customize the Mesh Filter and Mesh Render as desired.
To make the track, create a new object with a Track component and a Capsule Collider.
The Capsule Colliders' radius and center should be set to perfectly match the length of your track in the middle.
For the visuals of the table itself, create a new child of the track and set your meshes.
On the Turntable component, set the Bridge field to this child.
If you want to be able to push the turntable manually, add two objects under the Bridge object,
add Box Colliders to both, and assign them in the Turntable component.
Buffer Stops
The Default Buffer Stop
To use the default buffer stop, you can drag in the Buffer Stop prefab and snap it to the end of a track.
Custom Buffer Stops
To create custom buffer stops, create a new object with a Buffer Stop component.
When added, it'll also add a Track Snappable and a Box Collider.
To allow the buffer to snap to tracks, create a new child named "Snap Point".
This will be the reference point when snapping to trackage.
On the Track Snappable object, set the Reference Point to the "Snap Point" object.
The BoxCollider object is used to detect when a train hits it. It should be positioned a little in front of the buffer stop itself and about the width and height of the loading gauge.
To allow the buffer stop to interact with train buffers, create a new child called "Compression Point".
This should be positioned at coupler-height, and should be lined up with the front edge of the buffer.
On the Buffer Stop component, set the Compression Point to this object.
Lastly, create a new child called "Player Collider" with a Box Collider component.
This collider will be used to prevent the buffer stop from spawning inside a train when the game loads,
and as the collider the player interact with.
Back on the Buffer Stop, set the Player Collider to this object.